
PEPTIDES Mixing & Dosage Instructions

Below are comprehensive instructions for the mixing and dosing
of your newly acquired Peptide vial.
How should I store MY PEPTIDES?
Store your Peptides in the refrigerator between 36 F to 46 F (2 C to 8 C) directly after mixing.
To reconstitute your PEPTIDE vial
and prepare for your first dosage you require the following items
Disposing of used needles and
syringes in your trash bin
If you do not have an FDA-approved sharps disposal container, your household bin can be used however, the following standards must be met to use the household domestic bin. The domestic bin must be:
Figure A - Product Identification

Figure B

Instructions for Use
(PEPTIDES for injection)
Mixing instructions for PEPTIDE Vial: :
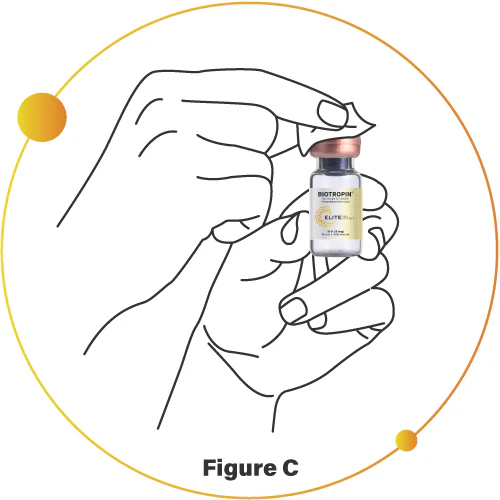
Step 1
Step 2
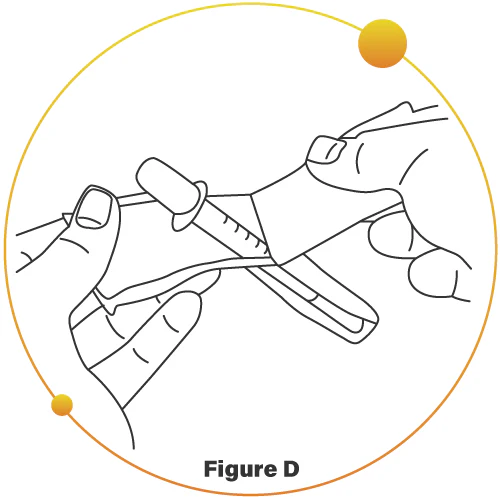
Open your first insulin needle from the packet. (Figure D)
Step 3
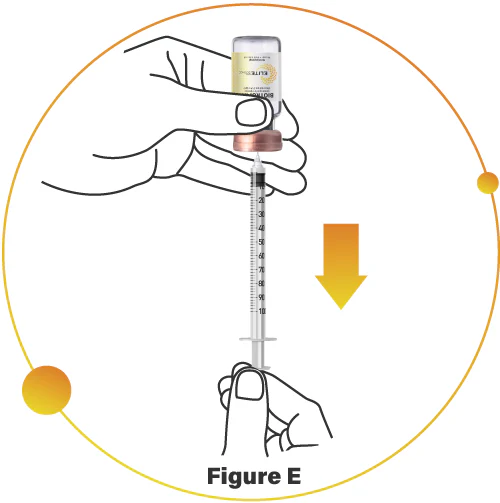
Insert the 3ml mixing needle into the Diluent (sterile water) vial, drawing up the amount of liquid required for your dosage. Place the lid on the needle tip and place aside for now. (Figure E)
Step 4
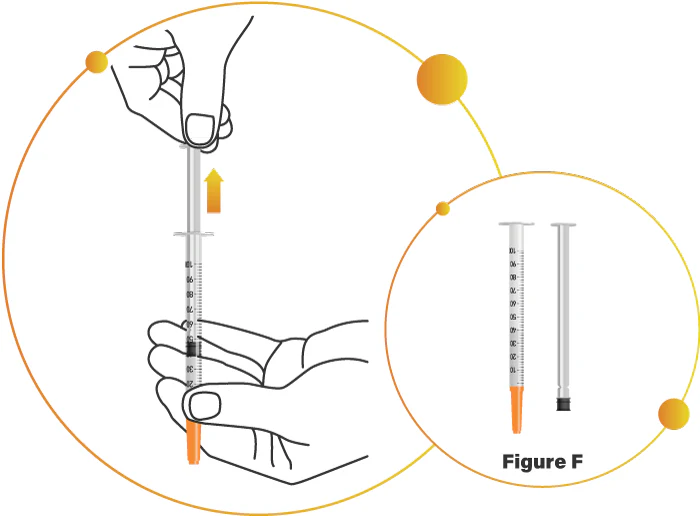
Pull the plunger (middle section) of the insulin needle out of the needle itself. This will create an air escape valve when adding the liquid into the vial. This will ensure air is released when the water is added, protecting the delicate somatropin powder. (Figure F)
Step 5
Insert the empty insulin needle into the peptide vial. (Figure G)

Step 6
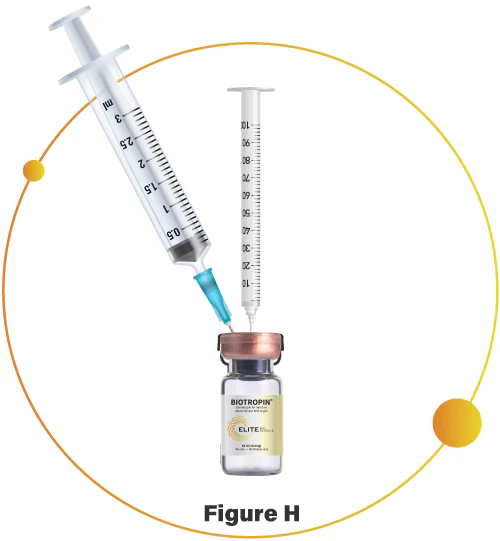
Insert the 3ml syringe with sterile water inside into the centre of the peptide vial rubber stopper placing the needle tip against the inside wall of the vial. *Do not aim the needle tip directly toward the peptide powder* Slowly push the sterile water into the peptide vial taking around 40 seconds to drip all the water against the glass vial. (Figure H)
Step 7
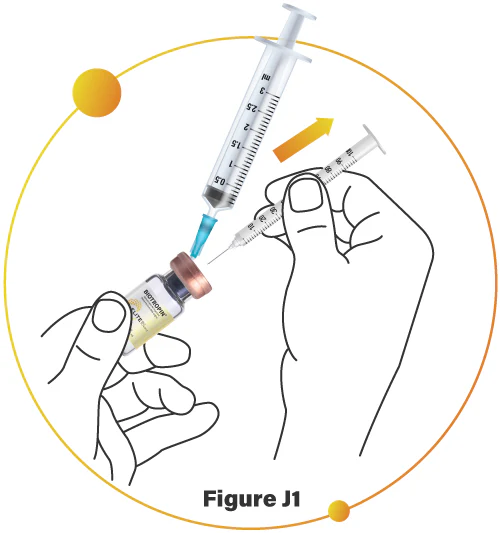
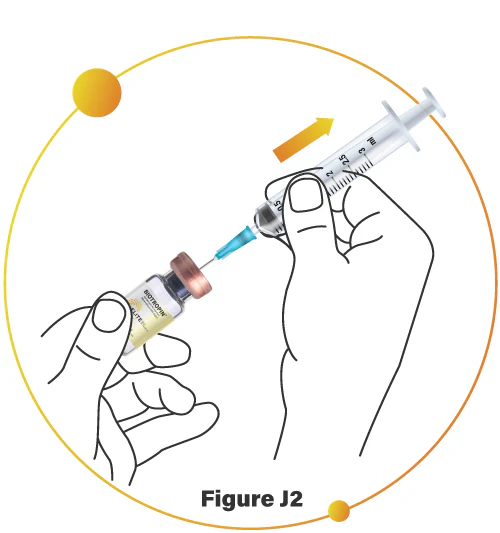
Remove the insulin syringe and the 3ml mixing needle from the peptide vial and dispose of the needles in the Sharps Container or approved trash bin (see Disposing of used needles and syringes in your trash bin at the start of this document). (Figures J1 and J2)
Step 8
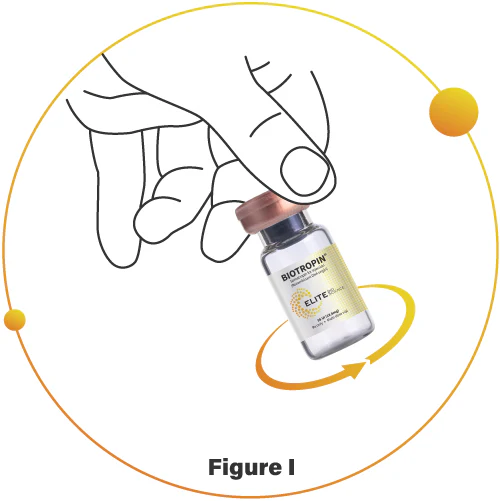
Holding the lid of the peptide vial gently swirl the solution in the vial in a circular motion, or roll the vial on the side in one direction (forward or back) until all the powder is dissolved. *DO NOT SHAKE* (Figure I)
Post-Mixing Instructions
Injection (Dosage) Instructions
Step 1

Step 2
Using the 2nd insulin needle pull back on the syringe plunger and draw up an amount of air equal to your peptide dosage. This will make it easier to draw up the liquid HGH. (Figure M)

Step 3
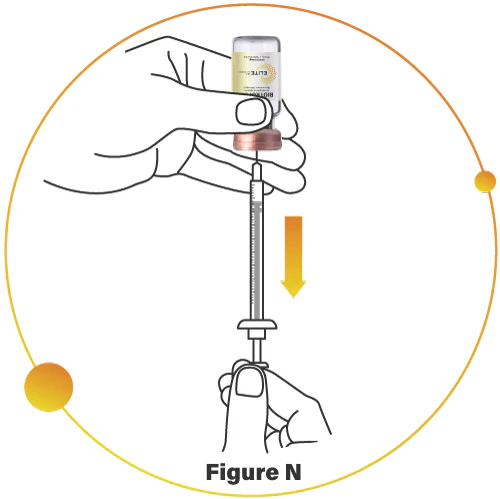
Insert the insulin needle into the peptide vial injecting the air first and then drawing up your dosage into the insulin syringe. Ensure there are no bubbles in the syringe. If there is slowly inject the liquid back into the vial and re-draw up your dosage.
Post-Mixing Instructions
(where to dose PEPTIDES)

Best practices for site injection
Dosage Instruction
Step 1

Step 2
Using the thumb and forefinger on one hand, pinch a fold of skin. (Figure Q)

Step 3
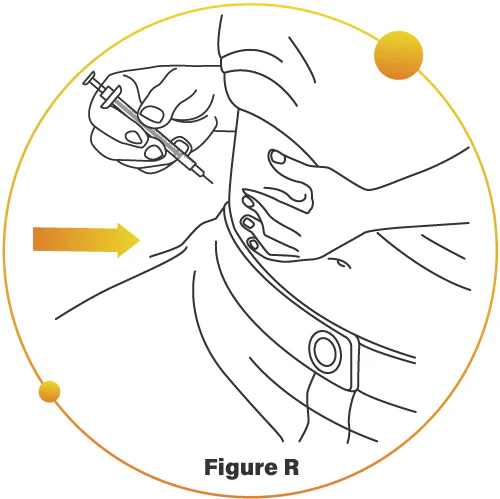
Taking the insulin syringe with the liquid peptide within it, hold the syringe at a 45 degree angle, insert the needle into the pinched area of skin. Ensure the needle tip is pushed all the way into the skin. (Figure R)
Step 4
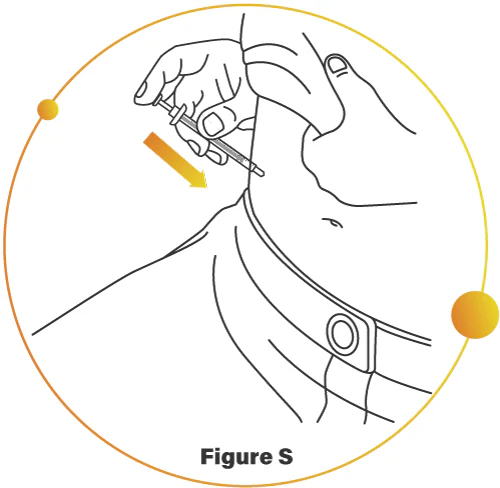
Release the pinched skin and slowly inject the liquid by applying pressure to the plunger end all the way down until the syringe is completely empty. (Figure S)
Step 5
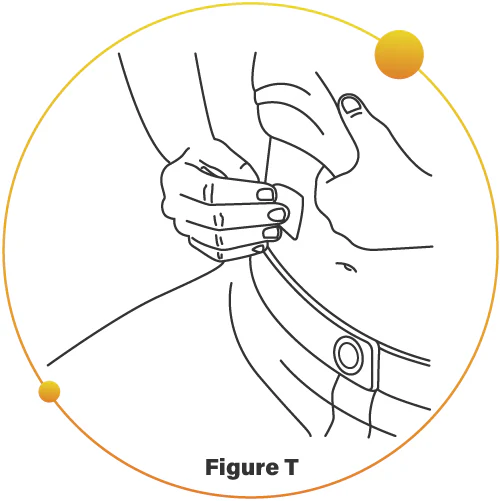
Quickly remove the needle and apply pressure to the injection site area with the Alcohol Prep Swab. Apply the lid back to the insulin syringe. (Figure T)
Step 6
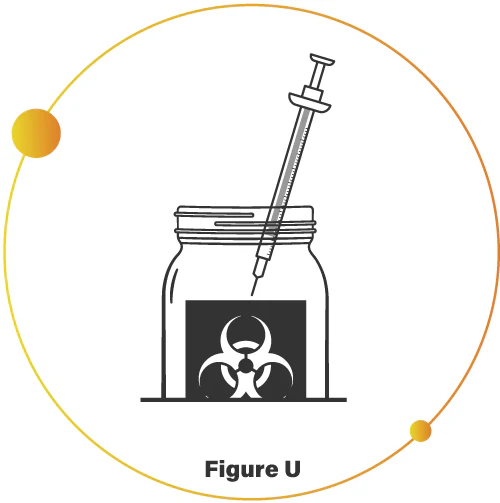
Dispose of all used syringes in a sharps container or approved domestic bin (see Disposing of used needles and syringes in your trash bin at the start of this document). (Figure U)
Step 7
Quickly remove the needle and apply pressure to the injection site area with the Alcohol Prep Swab. Apply the lid back to the insulin syringe. (Figure T)


